PolyLaneNet实践
PolyLaneNet 源码解析
工程结构
工程文件结构如下:
$ tree
.
├── LICENSE
├── README.md
├── cfgs
│   ├── elas.yaml
│   ├── elas_cls.yaml
│   ├── llamas.yaml
│   ├── tusimple.yaml
│   ├── tusimple_1order.yaml
│   ├── tusimple_2order.yaml
│   ├── tusimple_320x180.yaml
│   ├── tusimple_480x270.yaml
│   ├── tusimple_efficientnetb1.yaml
│   ├── tusimple_fulltrain.yaml
│   ├── tusimple_no_share_top_y.yaml
│   ├── tusimple_noaug.yaml
│   ├── tusimple_nopretrain.yaml
│   ├── tusimple_resnet34.yaml
│   └── tusimple_resnet50.yaml
├── figures
│   └── method-overview.png
├── lib
│   ├── __init__.py
│   ├── config.py
│   ├── datasets
│   │   ├── __init__.py
│   │   ├── elas.py
│   │   ├── lane_dataset.py
│   │   ├── llamas.py
│   │   ├── nolabel_dataset.py
│   │   └── tusimple.py
│   └── models.py
├── requirements.txt
├── test.py
├── train.py
└── utils
    ├── __init__.py
    ├── evaluator.py
    ├── gen_video.py
    ├── lane.py
    ├── metric.py
    ├── plot_log.py
    └── upperbound.py

5 directories, 37 files
cfg文件夹中,存储了yaml文件,用于对Train-Testing-Dataset的过程进行设定
数据的清洗在tusimple.py中,通过读取json文件,解析后得到annotation的结构体:
annotations.append({
                    'path': os.path.join(self.root, data['raw_file']),
                    'org_path': data['raw_file'],
                    'org_lanes': gt_lanes,
                    'lanes': lanes,
                    'aug': False,
                    'y_samples': y_samples
                })
path是raw_file绝对位置
org_path是相对位置
org_lanes是lanes中的数据
lanes是x和y清洗后的集合
y_sample是h_samples的值
lane_dataset.py中最关键的是transform_annotation函数:
lanes[lane_pos, 0] = category
lanes[lane_pos, 1] = lower / img_h
lanes[lane_pos, 2] = upper / img_h
lanes[lane_pos, 3:3 + len(xs)] = xs
lanes[lane_pos, (3 + self.dataset.max_points):(3 + self.dataset.max_points + len(ys))] = ys
利用lanes组装七个参数:
- 种类
- 最低点(均值化后)
- 最高点(均值化后)
- xs (点的x均值化后)
- ys (点的y均值化后)
- path (图像路径)
- anno (清洗后数据)
从网络的输出中可以看到
输出是
- s1---sn
- c1---cn
- 共享的h
从models.py中看出网络可以的backone可以设置
网络包含一个 forward + decode
decode中reshape为7:score + upper + lower + 4 coeffs = 7
也就是说 PolyLaneNet的最大能力是预测5条车道
loss一共包含五部分
loss = conf_loss + lower_loss + upper_loss + poly_loss + cls_loss
利用交叉熵和均方损失进行优化
conf_weight=1,
lower_weight=1,
upper_weight=1,
cls_weight=1,
poly_weight=300,
这个weight应该是作者反复试验,找到的很好的初始点.
tusimple.yaml
所有的设置文件的位置包括
- Training settings
- Testing settings
- Dataset settings
主要需要设定的有:
model:
    parameters:
        backbone:"efficientnet-b0"
# backbone使用的网络,支持efficientnet,resnet等

test_parameters:
    conf_threshold:0.5
# 置信度设定

dataset:tusimple
# 数据集类型

datasets:
    root
# 数据集位置
test.py
重点看一下 test.py的内容
main
读取参数和配置 设置种子和log 打印出Experiment/Config/input args
配置设备(cpu or gpu) 读取 num_epochs batch_size model epoch等
然后利用DataLoader设置数据的读取方式
实例化evalueator
设置logging的输出及格式
最关键的一句
_, mean_loss = test(model, test_loader, evaluator, exp_root, cfg, epoch=test_epoch, view=args.view)
将参数: 模型/数据/估计/目录/配置/epoch和是否可视化 传入test中 打印平均损失(mean_loss)
利用evaluetor.eval更新table, result给eval_str logging显示eval_str
test
test函数是关键
model.load_state_dict(torch.load(os.path.join(exp_root, "models", "model_{:03d}.pt".format(epoch)),map_location=torch.device('cpu'))['model'],False)
model.load_state_dict引入模型
贴一下pytorch上的文档解释
load_state_dict(state_dict, strict=True)[SOURCE]
Copies parameters and buffers from state_dict into this module and its descendants. If strict is True, then the keys of state_dict must exactly match the keys returned by this module’s state_dict() function.

Parameters
state_dict (dict) – a dict containing parameters and persistent buffers.

strict (bool, optional) – whether to strictly enforce that the keys in state_dict match the keys returned by this module’s state_dict() function. Default: True

Returns
missing_keys is a list of str containing the missing keys

unexpected_keys is a list of str containing the unexpected keys

Return type
NamedTuple with missing_keys and unexpected_keys fields
strict这个参数设定错误,导致研究了很久(Q3)
model.eval(),pytorch会自动把BN和DropOut固定住,不会取平均,而是用训练好的值。 在使用PyTorch进行训练和测试时一定注意要把实例化的model指定train/eval
读取loss test等参数 然后启动torch上下文管理器 进入test_loader循环 test_loader中拆解出idx,image,labels,img_idxs
images和labels存入GPU
outputs = model(images) 这句的封装没看懂
后面读取了model.loss
loss返回的内容
'conf': conf_loss,
            'lower': lower_loss,
            'upper': upper_loss,
            'poly': poly_loss,
            'cls_loss': cls_loss
将outputs/标签和置信度传入得到新的outputs
利用lane_outputs去接收outputs的输出 利用evaluator的add_prediction去添加eval的属性,主要解析利用lane_outputs
如果可视化开启,通过dataset.draw_annotation去获取preds
Q1 批量编辑文件夹所有图片
 cv2.imwrite('/home/no1/Desktop/read/ha/%05d'%(i)+'.jpg',I)      #按照00000~以此排序
    cv2.imwrite('/home/no1/Desktop/read/aa/'+'{}'.format(i)+'.jpg',I)   #按照1~以此排序
    cv2.imwrite('/home/no1/Desktop/read/hh/'+all_inp[i],I)                #按照原图命名排序
Q2 cv2.imwrite报错
OpenCV Error: Unspecified error (could not find a writer for the specifi
ed extension) in cv::imwrite_, file C:\ci\opencv_1512688052760\work\modu
les\imgcodecs\src\loadsave.cpp, line 677
Traceback (most recent call last):
  File "save_person_pic.py", line 44, in <module>
    catchPICFromcamera("catchpic",int(sys.argv[1]),int(sys.argv[2]),sys.
argv[3])
  File "save_person_pic.py", line 24, in catchPICFromcamera
    cv2.imwrite(img_name,image)
cv2.error: C:\ci\opencv_1512688052760\work\modules\imgcodecs\src\loadsav
e.cpp:677: error: (-2) could not find a writer for the specified extensi
on in function cv::imwrite_

原

cv2.imwrite(image_name,image)

改

cv2.imwrite(imagge_name.jpg,image)
Q3 RuntimeError: Error(s) in loading state_dict for SSD: Missing key(s) in解决办法
模型验证的时候运行出现RuntimeError: Error(s) in loading state_dict for SSD:Missing key(s) in state_dict: 解决办法
将
net.load_state_dict(torch.load(args.trained_model))
改为
net.load_state_dict(torch.load(args.trained_model), False)
之前有人说版本问题,更改后发现未解决
也有人说是加载的预训练模型使用了torch.nn.DataParallel(),而此时的训练并没有使用
添加model = torch.nn.DataParallel(model)
添加后,也没有解决
Q4 python3中urllib.error.URLError错误
在使用python3中的urllib.request模块抓取网页的时候使用一下的代码会报一个urllib.error.URLError错误
import urllib.request
response = urllib.request.urlopen('https://www.python.org')

urllib.error.URLError: <urlopen error [SSL: CERTIFICATE_VERIFY_FAILED] certificate verify failed: unable to get local issuer certificate (_ssl.c:1045)>
使用urllib.urlopen一个 https 的时候会验证一次 SSL证书。当目标使用的是自签名的证书时就会报urllib.error.URLError错误。解决方法如下:
import urllib.request
import ssl
ssl._create_default_https_context = ssl._create_unverified_context
response = urllib.request.urlopen('https://www.python.org')
print(response.read().decode('utf-8'))
通过导入ssl模块把证书验证改成不用验证就行.
Q5 将运行结果保存在文件中
$ ls > ls.txt 或者 ls-->ls.txt
把ls命令的运行结果保存到文件ls.txt中 其中logging信息保存的问题 专门写一个logging的文档里面说吧
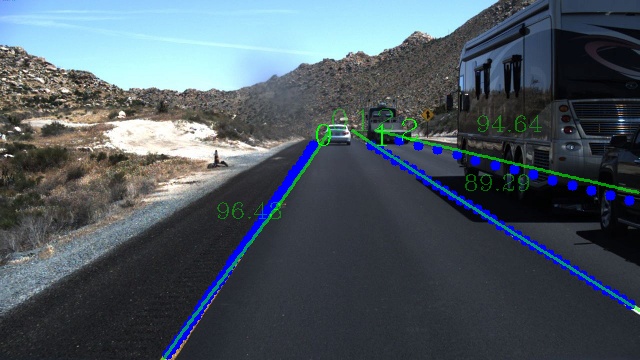
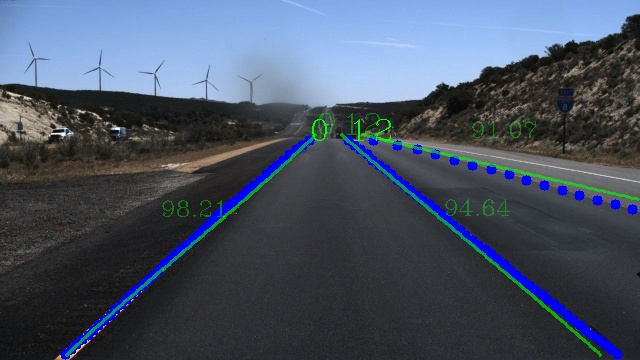
最后放两张 嘚瑟一下